
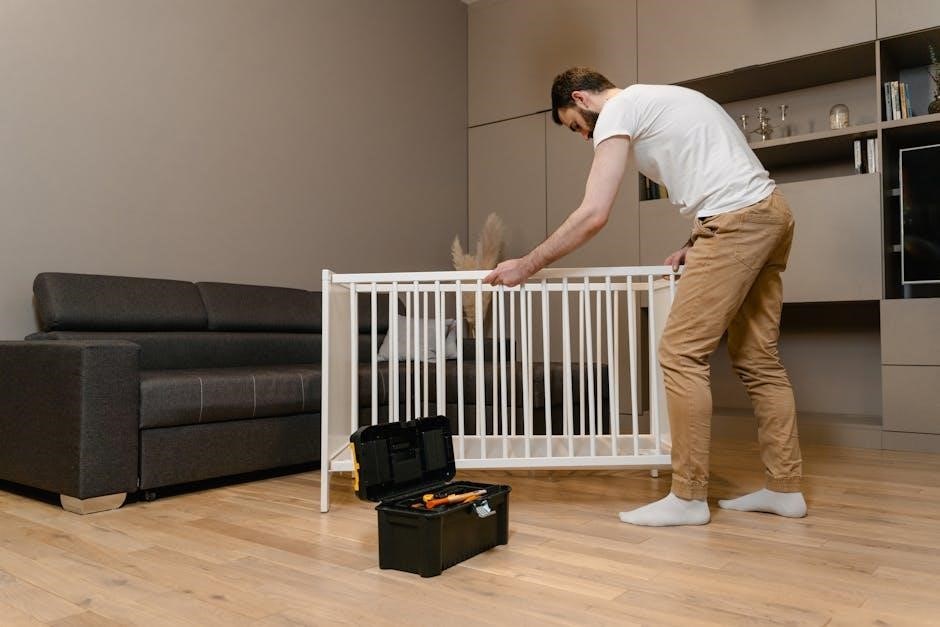
Embark on your bunk bed construction journey with these comprehensive instructions. Safety is paramount, so carefully follow each step for a sturdy and reliable result. Gather your tools, inventory parts, and prepare for a rewarding assembly experience ensuring sound construction.
Preparation Before Assembly
Before diving into the bunk bed assembly, meticulous preparation is key. Begin by carefully unpacking all components and comparing them against the provided parts list. This ensures you have everything necessary and identifies any missing or damaged items early on. Clear a spacious, well-lit area where you can comfortably work, protecting the floor with a drop cloth or cardboard to prevent scratches.
Thoroughly read through the entire instruction manual before starting, familiarizing yourself with each step and diagram. This proactive approach minimizes errors and saves time in the long run. Organize your tools and hardware within easy reach, such as a power screwdriver with appropriate bits, an adjustable wrench, and a rubber mallet.
Consider enlisting a helper, as some steps may require two people for safety and efficiency. Double-check the certification label, usually on the top headboard, to ensure you are referencing the correct instruction set for your specific bunk bed model. By taking these preparatory steps, you set the stage for a smooth and successful bunk bed assembly process.

Inventory of Parts and Hardware
A meticulous inventory of all parts and hardware is critical before commencing the bunk bed assembly. Begin by cross-referencing each item received against the detailed parts list included in the instruction manual. Carefully identify and separate components such as headboards, footboards, side rails, ladder rungs, and guard rails.
Pay close attention to the various types of screws, bolts, dowels, and other fasteners. Organize them into labeled containers or compartments to prevent confusion during assembly. Verify the quantity of each item to ensure no pieces are missing. If discrepancies are found, contact the manufacturer or retailer immediately for replacements.
Examine each part for any signs of damage, such as scratches, dents, or cracks. Damaged components should also be reported and replaced before proceeding. Taking the time to thoroughly inventory parts and hardware not only prevents frustration down the line but also ensures the structural integrity and safety of the assembled bunk bed. This proactive step is essential for a successful and worry-free construction process.
Tools Required for Assembly
Before embarking on the bunk bed assembly, gathering the necessary tools is crucial for efficiency and safety. Essential tools include a Phillips head screwdriver, preferably a power screwdriver with a medium-sized bit, to expedite the process and ensure screws are securely fastened. An adjustable wrench or a set of open-end wrenches will be needed for tightening bolts and nuts.
A rubber mallet can be useful for gently tapping components into place without causing damage. A measuring tape will help ensure proper alignment and spacing, while a level is essential for verifying that the bed frame is perfectly horizontal and vertical. Safety glasses should always be worn to protect your eyes from debris or accidental impacts.
Additionally, consider having a utility knife or scissors on hand for opening packaging and cutting zip ties. A stud finder may be necessary if you plan to attach the bunk bed to the wall for added stability. Having all these tools readily available will streamline the assembly process and minimize frustration, leading to a safer and more enjoyable experience. Remember to consult the bunk bed’s instruction manual for specific tool recommendations.
Assembling the Bed Frame
The initial step in bunk bed construction is assembling the main bed frame, a fundamental process determining the bed’s structural integrity. Begin by identifying the headboards and footboards, usually distinguishable by their size or design features. Position the first headboard upright, ensuring the pre-drilled holes face inward for rail attachment. Next, carefully align the side rails with the headboard, inserting any metal pins or connecting hardware as specified in the instructions.
Secure the rails to the headboard using bolts or screws, tightening them gradually to ensure even distribution of pressure. Repeat this process for the footboard and the remaining side rail, creating a rectangular frame. Once the four sides are connected, double-check the alignment and squareness of the frame using a measuring tape and level.
If the frame is not square, gently adjust the corners until it is perfectly aligned. Finally, tighten all bolts and screws securely, but avoid over-tightening, which could damage the wood. This completed frame forms the stable base upon which the rest of the bunk bed will be built, so take your time and ensure it is assembled correctly. Verify stability.
Attaching the Bed Rails
Securing the bed rails is crucial for the bunk bed’s stability and safety. Identify the bed rails—typically long, rectangular pieces with hardware attachment points. Position a rail against the inner side of a headboard or footboard. Ensure the rail’s pre-drilled holes align with those on the bed frame. Insert bolts through the aligned holes, adding washers for enhanced stability and to prevent wood damage. Hand-tighten the bolts initially, ensuring the rail sits flush against the frame.
Repeat this process for all connection points on that rail before moving to the opposite side. Once all bolts are in place, use a wrench or appropriate tool to firmly tighten each one. Avoid over-tightening, which can strip the threads or damage the wood. Regularly check the tightness of these bolts over time to maintain the bed’s structural integrity.

Repeat the entire process for the remaining bed rails, ensuring each is securely fastened. Once all rails are attached, inspect the entire frame, verifying that there are no gaps and that all connections are solid and secure. A properly attached rail system ensures a stable and secure bunk bed structure.
Installing the Ladder
The ladder is a vital safety component, providing access to the top bunk. Begin by identifying the ladder parts: the ladder legs and the rungs. Position the ladder legs against the bunk bed frame at the designated attachment points, usually near the headboard or footboard. Ensure the ladder is oriented correctly, with the rungs facing outward for easy climbing. Align the pre-drilled holes on the ladder legs with those on the bed frame.

Insert bolts through the aligned holes, using washers for added stability and to protect the wood. Hand-tighten the bolts initially to ensure proper alignment. Once all bolts are in place, use a wrench or appropriate tool to securely tighten each one. Avoid over-tightening, which can damage the wood or strip the threads.
After securing the ladder to the frame, test its stability. Ensure it is firmly attached and does not wobble or shift. If necessary, adjust the bolts or add additional support. Regularly inspect the ladder for any signs of wear or damage, and promptly address any issues to maintain safety. A properly installed ladder provides safe and convenient access to the upper bunk.
Installing the Guard Rails
The guard rails are essential for preventing falls from the top bunk, ensuring safety during sleep. Identify the guard rail components and their designated locations along the upper bunk’s sides. Position the guard rails so they provide adequate coverage, typically spanning most of the length of the bunk. Align the pre-drilled holes on the guard rails with those on the bed frame. Insert bolts through the aligned holes, using washers for added stability and to prevent damage to the wood.
Hand-tighten the bolts initially to ensure proper alignment of all guard rail sections. Once all bolts are in place, use a wrench or appropriate tool to securely tighten each one. Avoid over-tightening, which can strip the threads or damage the wood. Ensure the guard rails are firmly attached and do not wobble or shift. Test the stability of the guard rails by applying gentle pressure to ensure they can withstand typical use.
Regularly inspect the guard rails for any signs of wear, damage, or loose bolts. Tighten any loose bolts immediately and replace damaged parts as needed. Ensure the guard rails meet safety standards and provide adequate protection. A properly installed and maintained guard rail system is crucial for preventing accidents and ensuring the safety of the bunk bed occupant.
Securing the Upper Bunk to the Lower Bunk
Safely and securely connecting the upper bunk to the lower bunk is a critical step in bunk bed assembly. This process ensures stability and prevents accidental separation, safeguarding occupants. Start by carefully aligning the upper bunk frame directly above the lower bunk frame. Check that the corners and edges match up properly, ensuring a flush and even fit.
Locate the hardware specifically designed for joining the two bunks. This typically consists of metal pins, bolts, or brackets. Insert the connecting hardware into the pre-drilled holes on both the upper and lower bunk frames. If using bolts, use washers to distribute pressure and prevent damage to the wood. Tighten the bolts or secure the pins firmly to create a solid connection. Double-check that all connecting points are properly secured.
Once the bunks are connected, test the stability of the entire structure. Gently shake the bunk bed to assess its sturdiness. If any wobbling or movement is detected, re-tighten the connecting hardware and inspect for any loose or misaligned components. Ensure the bunk bed remains stable and secure under normal use conditions.
Safety Checks and Final Adjustments
Before allowing anyone to use the newly assembled bunk bed, perform thorough safety checks and final adjustments. Begin by inspecting all bolts, screws, and connecting hardware. Ensure every component is tightly secured and properly aligned. Wiggle each part of the bed frame, paying close attention to areas where pieces connect. If anything feels loose or unstable, re-tighten or adjust as needed.
Next, examine the ladder and guard rails. Make sure the ladder is firmly attached to the bed frame and the steps are stable. The guard rails should be securely fastened and extend high enough to prevent falls from the top bunk. Test the ladder and guard rails by applying gentle pressure to ensure they can withstand weight and movement.
Finally, assess the overall stability of the bunk bed. Gently shake the entire structure to check for wobbling or instability. If any movement is detected, re-examine all connections and make necessary adjustments. Ensure the bunk bed is level and sits evenly on the floor. Address any unevenness by using shims or adjusting the feet of the bed frame.
Disassembly and Troubleshooting
If you need to disassemble the bunk bed, perhaps for moving or storage, follow these instructions in reverse order of the assembly process. Start by removing the mattress and any bedding from the bunks. Detach the ladder and guard rails, carefully setting aside all hardware. Next, separate the upper bunk from the lower bunk, taking care to avoid any sudden movements.
Remove the bed rails from the headboards and footboards, storing the hardware in labeled bags to prevent loss. Disassemble the headboards and footboards themselves, keeping track of all screws and bolts. Once the bed is fully disassembled, inspect all parts for damage or wear. Replace any broken or worn components before reassembling the bed in the future.
If you encounter any problems during assembly or disassembly, consult the troubleshooting section of the instructions. Common issues include missing parts, stripped screws, or misaligned components. Refer to the diagrams and instructions to identify the correct placement and orientation of each part. If you are unable to resolve the issue on your own, contact the manufacturer or a qualified furniture technician for assistance.