
Welcome to the JVC Car Stereo User Manual! This guide provides essential information for installing, operating, and troubleshooting your JVC car audio system․ Read carefully for optimal use․
1․1 Understanding the Purpose of the Manual
This manual is designed to guide you through the safe and effective use of your JVC car stereo system․ It covers installation, setup, and operation, ensuring you maximize its features․ Topics include wiring, connectivity, and troubleshooting to address common issues․ The manual also explains advanced functions like Bluetooth pairing and USB connections, helping you enjoy a seamless audio experience․ Refer to this guide for detailed instructions on optimizing your car stereo’s performance and resolving technical difficulties promptly․ Always follow the guidelines to maintain your system’s longevity and functionality․ Proper use ensures enhanced sound quality and user satisfaction․
Reading the JVC car stereo manual is crucial for understanding its features, proper installation, and troubleshooting․ It ensures safe operation, prevents damage, and helps you avoid common mistakes․ The manual provides step-by-step guidance for wiring, connectivity, and advanced settings, optimizing your audio experience․ By following the instructions, you can resolve issues quickly and maintain your system’s performance․ Familiarizing yourself with the manual will help you unlock all the features and enjoy a hassle-free experience with your JVC car stereo․ Regular updates and maintenance tips are also included for longevity․ Always refer to it for optimal use․ Start by ensuring all components are included and compatible․ Follow wiring diagrams carefully, connecting power, ground, and speaker cables․ Mount the stereo securely in the dashboard, ensuring proper antenna connection for optimal reception․ Refer to the manual for specific installation steps and troubleshooting tips to avoid common issues․ Before installing your JVC car stereo, ensure you have all necessary components, including the wiring harness, mounting kit, and antenna adapter․ Verify vehicle compatibility and power requirements․ Check the dashboard dimensions to confirm the stereo fits․ Ensure the antenna control wire (ANT․ CONT) is connected for auto-antenna functionality․ Review the wiring diagram to avoid mismatches․ Update the firmware if available․ Consult the manual for specific instructions and safety precautions․ Gather tools like screwdrivers and wire strippers․ Test all connections before final installation to ensure proper function and avoid damage to the system․ Connect the wiring harness to your JVC car stereo, ensuring color-coded wires match correctly․ The yellow wire is for constant power, red for ignition, and black for ground․ Connect the antenna control wire (ANT․ CONT) to enable auto-antenna functionality․ For speaker wires, match front and rear channels to the vehicle’s speaker system․ Ensure the USB and auxiliary inputs are securely connected for external device compatibility․ Refer to the wiring diagram in your manual for specific instructions․ Proper connections are crucial for optimal performance and to avoid damage to the system․ Mount the JVC car stereo securely in the dashboard using the provided mounting kit․ Ensure the unit is aligned properly with the dashboard opening․ Connect the wiring harness to the stereo, making sure the antenna control wire (ANT․ CONT) is linked for auto-antenna functionality․ Use screws to fasten the stereo firmly in place․ Refer to the manual for specific installation instructions․ Ensure all connections are secure to prevent loose wires․ Proper mounting ensures stability and optimal performance while driving․ Always disconnect the battery before starting installation to avoid electrical hazards․ Learn to operate your JVC car stereo with ease․ Understand the control panel, navigate the menu system, and adjust settings for optimal sound quality and functionality․ The JVC car stereo features intuitive controls for seamless operation․ The volume knob adjusts sound levels, while playback buttons manage track selection and playback․ The menu button navigates settings, and source buttons switch between modes like radio, USB, and auxiliary input․ The antenna control wire (ANT․ CONT) automatically extends the antenna when the unit is powered on, ensuring optimal radio reception․ Familiarize yourself with these controls to enhance your driving experience and customize your audio preferences effortlessly․ Navigating the JVC car stereo menu system is straightforward․ Use the Menu button to access settings, and the Select button to confirm choices․ The Up and Down buttons scroll through options, while the Back button returns to the previous screen․ Pressing Menu again exits the menu․ This intuitive design allows you to adjust settings like sound customization, display preferences, and connectivity options without distraction․ Familiarize yourself with these controls to optimize your listening experience and explore advanced features seamlessly․ Adjusting sound settings on your JVC car stereo enhances your listening experience․ Use the Bass, Treble, and Balance controls to customize audio output․ The Fader adjusts front-to-rear speaker distribution, while the Equalizer (EQ) offers preset or custom sound profiles․ Access these settings via the menu, selecting Sound or Audio Settings․ Adjustments are made using the Select and Up/Down buttons․ Experiment with settings to optimize clarity, bass response, and overall sound quality for your preferred music genres or audio sources․ Learn to operate the AM/FM radio, including tuning stations, presetting favorites, and improving reception for optimal listening experience while driving․ Tune AM/FM stations by pressing the radio button and using the tuning knob or buttons․ Manually adjust to find your desired station or use preset buttons for quick access․ For automatic tuning, press and hold the seek button to scan and lock onto strong signals․ Use the numeric keypad to directly enter station frequencies․ Ensure the antenna is fully extended for better reception․ Save frequently listened-to stations to presets for easy access later․ Adjustments can also be made via the menu system for personalized listening preferences․ To preset favorite stations, tune to the desired station using the tuning knob or seek button․ Press and hold one of the preset buttons (1-6) until a beep sounds, confirming the station is saved․ Repeat for additional stations․ Preset buttons provide quick access to your favorite stations․ For multiple stations, use different preset buttons․ The number of presets varies by model․ To recall a preset station, simply press the corresponding button․ Some models allow renaming presets for easier identification․ Overwrite existing presets by saving a new station to the same button․ To enhance radio reception, ensure the antenna is fully extended and free from damage․ Park your vehicle in an open area away from tall buildings or hills․ Avoid interference from other electronic devices․ Use the stereo’s built-in noise reduction features․ Adjust the tuner for optimal signal strength․ For weak signals, switch to mono mode to reduce static․ Clean the antenna regularly to maintain clarity․ If issues persist, consider upgrading to an external antenna for better performance․ Proper installation and alignment can significantly improve reception quality․ Always ensure the stereo is updated with the latest firmware․ Explore pairing devices, wireless audio streaming, and maintaining stable connections․ Learn how to integrate smartphones and enable hands-free calls for a seamless driving experience․ Ensure compatibility and range․ To pair your smartphone with the JVC car stereo, ensure Bluetooth is enabled on both devices․ Select the stereo’s name from your phone’s Bluetooth menu․ If prompted, confirm the pairing code․ Once connected, you’ll be able to make hands-free calls and stream audio․ Make sure devices are in close range for a stable connection․ Refer to your phone’s Bluetooth settings for additional guidance․ Pairing is a one-time process; the stereo will remember your device for future use․ Troubleshoot by resetting Bluetooth if issues arise․ Once paired, your smartphone can stream audio to the JVC car stereo via Bluetooth․ Start playback on your phone, and the audio will automatically play through the car speakers․ Ensure the stereo is in Bluetooth mode and selected as the audio source․ For optimal quality, keep your phone within range and avoid physical obstructions․ If audio skips, check your phone’s Bluetooth settings or restart the connection․ This feature allows seamless music and podcast playback while driving․ Troubleshooting tips are available in the manual if issues occur․ If Bluetooth connectivity issues arise, restart both the JVC stereo and your device․ Ensure Bluetooth is enabled on your smartphone and the stereo is in pairing mode․ Move devices closer to improve signal strength․ Check for interference from other wireless devices․ If issues persist, reset the stereo to factory settings or re-pair the device․ Verify that your phone’s Bluetooth software is updated․ For persistent problems, consult the manual or contact JVC support for assistance․ Troubleshooting steps help restore a stable Bluetooth connection for uninterrupted audio streaming․ Connect USB devices or auxiliary cables to enjoy music from external sources․ Ensure devices are compatible with the stereo’s input formats for optimal playback․ Always check device settings and clean ports to maintain proper connectivity and sound quality․ This feature enhances your in-car entertainment experience by expanding audio source options beyond built-in functions․ To connect a USB device, locate the USB port on the JVC car stereo․ Insert the USB drive or connect via a compatible cable․ Ensure the device is properly seated and recognized by the stereo․ The system will automatically detect and begin playing audio․ For optimal performance, use a high-quality USB cable and ensure the device is formatted with supported audio formats․ Always disconnect the device safely to prevent data loss or damage to the port․ Regularly check for firmware updates to maintain compatibility with various USB devices․ Once connected, the JVC car stereo will automatically detect and play music from your USB device․ Supported formats include MP3, WMA, and AAC․ Use the stereo’s controls to navigate through playlists, albums, or folders․ You can adjust playback settings like shuffle or repeat․ For optimal playback, ensure your device’s files are properly organized and formatted․ The stereo also supports external devices like smartphones or MP3 players via auxiliary inputs․ Always ensure compatibility and organize your music files clearly for seamless playback․ Regularly update your device’s firmware for enhanced performance․ The JVC car stereo offers advanced features like voice command functionality and customizable display settings․ These enhance your driving experience with convenience and personalization options, ensuring optimal entertainment and control while on the road․ The JVC car stereo supports voice command functionality, allowing seamless integration with Siri and Google Assistant․ This feature enables hands-free control of key functions, such as adjusting volume, changing tracks, or making calls․ By connecting your smartphone via Bluetooth, you can access these voice commands directly through the stereo․ This integration enhances convenience and safety while driving, minimizing distractions and ensuring a more enjoyable experience on the road․ Ensure your device is properly paired and configured for optimal performance․ The JVC car stereo allows you to personalize its display to match your preferences․ Adjust brightness, contrast, and color schemes to enhance visibility and aesthetics․ You can also customize the display timeout settings to conserve power or reduce distractions while driving․ Select from various animation effects and button illumination options to create a unique visual experience․ Access these settings through the menu system by pressing the remote control or touchscreen, ensuring a tailored interface that suits your driving environment․ Regular maintenance ensures optimal performance․ Clean the exterior gently, avoid extreme temperatures, and protect from moisture․ Use soft cloths and avoid harsh chemicals․ Ensure proper ventilation and update firmware periodically for best functionality․ Regularly clean the stereo and screen to maintain clarity and functionality․ Use a soft, dry cloth to wipe the exterior and buttons․ For stubborn marks, dampen the cloth slightly, but avoid liquids directly on the unit․ Gently clean the touchscreen with a microfiber cloth to prevent scratches․ Avoid harsh chemicals or abrasive materials that could damage the surface․ Clean the stereo’s crevices with a soft-bristle brush to remove dust․ Regular cleaning prevents dirt buildup and ensures optimal performance and visibility․ Updating your JVC car stereo’s firmware ensures optimal performance, new features, and bug fixes․ Visit the JVC website to check for the latest firmware version․ Download the update to a USB drive and insert it into the stereo’s USB port․ Navigate to the settings menu, select “Firmware Update,” and follow on-screen instructions․ Do not turn off the stereo during the update․ Once complete, restart the system to apply changes․ Regular updates keep your stereo up-to-date with the latest enhancements and improvements․ Troubleshooting common issues with your JVC car stereo begins with identifying symptoms․ Check connections, settings, and ensure proper installation․ Consult the manual for specific solutions․ If problems persist, contact JVC support for assistance․ If your JVC car stereo has no power or display, start by checking the power source․ Ensure the ignition is in the correct position and all connections are secure․ Verify the wiring harness is properly plugged in and not damaged․ Check the fuse or circuit breaker to ensure it hasn’t tripped․ If the display is dark, try adjusting the brightness settings or resetting the unit․ Consult the manual for specific reset instructions․ If issues persist, contact JVC support for further assistance․ If experiencing audio distortion or no sound, check all connections for looseness․ Ensure speakers are properly wired and functioning․ Verify the equalizer settings are not extreme, as this can cause distortion․ If using a USB device, ensure files are in a compatible format․ Reset the stereo to factory settings if issues persist․ Check for external interference from other devices․ If no sound, ensure the volume is not muted or too low․ Consult the manual for specific troubleshooting steps or contact JVC support for assistance․ If experiencing connectivity issues, restart both the stereo and the connected device․ Ensure Bluetooth is enabled on both ends and in pairing mode․ Check for physical obstructions or distance interfering with the signal․ Verify the device is properly paired and selected as the audio source․ Clear old or multiple pairings from the stereo’s list․ Update the stereo’s firmware if outdated; If issues persist, reset the stereo to factory settings, but note this will erase custom settings․ Consult the manual or contact JVC support for further assistance․ Mastering your JVC car stereo enhances your driving experience․ Explore its features, customize settings, and maintain it properly for optimal performance․ Refer to this manual for troubleshooting and care tips to ensure long-lasting enjoyment of your audio system․ The JVC car stereo offers a range of innovative features to enhance your driving experience․ It includes Bluetooth connectivity for seamless smartphone pairing, USB and auxiliary inputs for external device integration, and AM/FM radio for tuning into your favorite stations․ The stereo also features customizable sound settings, such as EQ modes and bass boost, to tailor your audio preferences․ Additionally, it supports voice command integration and wireless audio streaming, ensuring convenience and versatility․ These features make it a comprehensive and user-friendly entertainment system for your vehicle․ To maximize your JVC car stereo experience, ensure regular firmware updates for the latest features and improvements․ Clean the display and controls regularly to maintain functionality․ Adjust sound settings according to your preference for the best audio quality․ Always disconnect USB devices properly to prevent data loss․ For optimal performance, avoid exposing the stereo to extreme temperatures or moisture․ Familiarize yourself with the menu system to explore all functionalities seamlessly․ Proper installation and wiring are crucial for reliable operation․ Enjoy a hassle-free and enhanced driving experience with your JVC car stereo․1․2 Importance of Reading the Manual

Installation and Setup

2․1 Pre-Installation Checklist

2․2 Wiring and Connectivity Guide
2․3 Mounting the Stereo in the Dashboard

Operating the JVC Car Stereo
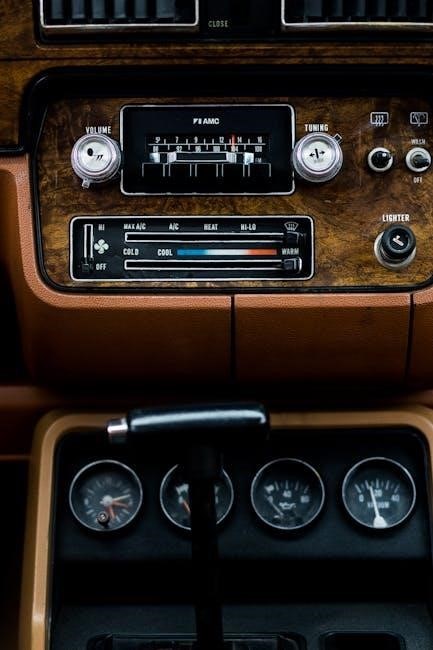
3․1 Basic Controls and Functions
3․2 Navigating the Menu System
3․3 Adjusting Sound Settings
AM/FM Radio Operation
4․1 Tuning Stations
4․2 Presetting Favorite Stations
4․3 Improving Radio Reception
Bluetooth and Wireless Connectivity
5․1 Pairing Your Smartphone
5․2 Streaming Audio via Bluetooth
5․4 Troubleshooting Bluetooth Connections
USB and Auxiliary Input
6․1 Connecting USB Devices
6․2 Playing Music from External Sources

Advanced Features
7․1 Voice Command and Siri/Google Assistant Integration
7․2 Customizing Display Settings

Maintenance and Care
8․1 Cleaning the Stereo and Screen
8․2 Updating Firmware
Troubleshooting Common Issues
9․1 No Power or Display Issues
9․2 Audio Distortion or No Sound
9․3 Connectivity Problems
10․1 Summary of Key Features
10․2 Final Tips for Optimal Use